Wednesday, November 28, 2012

Oven-roasted Vegetables and Meat

This has become one of my new favorite meals. It's super simple, healthy, and quick to make!


Preheat your oven to about 225 C (430 F).

First you need vegetables. Either fresh or frozen work just fine. Frozen vegetables tend to have more vitamins in them due to them being flash-frozen shortly after being picked, as opposed to "fresh" vegetables we buy in the store, which have been transported halfway around the country, if not the world, and can take up to weeks from picking to eating.

Anyways, put your vegetables in a 9x13 inch (23x33 cm) baking dish, drizzle with olive oil, and sprinkle with salt and pepper.


The next step is to sear your meat over high heat. Don't cook it fully, just brown it. Here I've used beef, spiced up with a little pepper and paprika.


The last step is to simply place your meat upon the vegetables, then set the whole thing in the oven. Wait 30 minutes, then enjoy a simple, delicious, healthy meal!


Monday, November 19, 2012

The Second Cup -- Finale


Now the cup is finally done sanding, so now it's on to staining the cup. Since the cup is going to be used for drinking from, we need a natural stain; Olive oil works perfectly for this!


First, just pour some olive oil on the cup, and spread it around using your fingers. I suppose you could use a paint brush, but olive oil is so good for your skin, so why pass up the opportunity? It's obvious where the oil has stained already, so just make sure to spread it evenly around the whole cup.


Next is to stain the inside of the cup. Pour some olive oil in, then work it in with your fingers. Don't be shy with the amount of olive oil you use, it's amazing how much the wood absorbs. Keep adding layers of olive oil until you have about 5 layers, letting it "dry" each time in between layers.


Here you can see I just added another layer of olive oil, but it's already being absorbed on the front side. Don't forget the handle holes, by the way!

So now, the cup is essentially finished, it just needs another layer or two of olive oil, then it's ready for use! Perfect for trips in the woods, coffee for deer hunting, water when hiking, or just standing for show.

Sunday, November 18, 2012

Samsung Note 10.1 Tattoo Tutorial

Ok, so I'm trying to learn Photoshop Touch, which is supposed to be easier than Photoshop, but there is not a single help button to be found (at least not in any reasonably-accessible place). I started messing around with the tutorials, which were not quite so helpful themselves, either skipping steps, or forgetting to add buttons for other steps. But, despite all the hardship, I found one tutorial so far that's worked for me, so I thought I'd share it with you! Please please PLEASE excuse the horrible pink house-shoes I'm wearing!

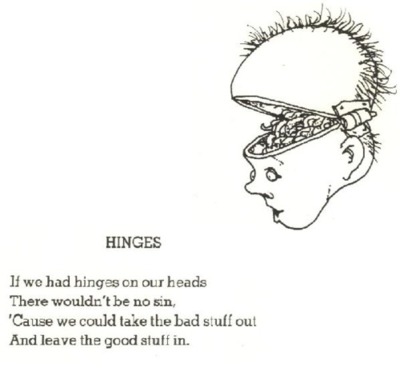
I really want a new tattoo, and this time I'm thinking of Backwards Bill by Shel Silverstein. Backwards Bill means a lot to me, because he does everything backwards, yet somehow succeeds. I feel this reflects a bit on my own life, but also I love horses...so Backwards Bill it is!


For this assignment you need Photoshop Touch, preferably for Samsung Note 10.1. The opening screen looks like this:


There's a tiny little button on the bottom right, which is for adding pictures to work with. I've highlighted it in the picture above.

The next step is to take a picture of the body part you want your "tattoo" on. I chose my ankle.


Now you need to add a new layer, which is the small plus sign to the bottom right. Chose "Photo Layer", then chose the tattoo/drawing of your liking. This will transpose the tattoo image on top of your body. At this point you may resize and readjust the tattoo image to your liking. 


Here you can see the tattoo image is clearly too big for my ankle. Now it's simply to use the dots on the corners to scale the image to the right size. Don't forget to place your tattoo in the right spot now, also, as you won't be able to move it later. When you're all finished resizing and readjusting, click "Done".


Next we have to work on our tattoo image to make sure it looks all right after post-processing. Select the top-most picture on your right (in this case, the one above my leg, or the tattoo picture itself). This is the layer we're going to be working with. We're going to have to use the Effects setting, and use the sharpen function to make the lines more crisp. This makes for clearer lines on the final picture. The Effect settings are to be found here:


After you've sharpened the outline of your tattoo image, it's time to blend the white background in with your skin color. 


For this we need to press the button beside the plus sign on the bottom right, I have no idea what it's supposed to be, and neither does it have a name. In this mode you have two choices: Opacity, and Blend Mode. First, set Blend Mode to darken. Then, play around with the Opacity until the "tattoo" looks natural to you (usually around 70%, but I like it closer to 100%).


There you have it, instant tattoo!


Saturday, November 17, 2012

A Tribute to Shel Silverstein

Shel Silverstein was an American poet and author of children's books, as well as illustrator, among other things. I grew up reading his books, and have been fascinated by them ever since. He gives such meaning to his poems, often hidden messages, life-lessons as it were. So, in honor of my favorite American poet, I give you a tribute to Shel Silverstein.

Backwards Bill
 Sometimes I feel like Backwards Bill, doing everything a little bit different from the rest of the population. But hey, it's all good!

 Great advice!

 I think all women feel this way sometimes, we just need to be told how wonderful we are...as long as it's the truth!


Such great advice in this day and age, where we're practically force-fed thoughts, ideas, and ideologies.

Imagine being happy all the time...Here's a quote from Butters from South Park to make you feel better:
"Well yeah, and I'm sad, but at the same time I'm really happy that something could make me feel that sad. It's like, it makes me feel alive, you know? It makes me feel human. And the only way I could feel this sad now is if I felt somethin' really good before. So I have to take the bad with the good, so I guess what I'm feelin' is like a, beautiful sadness. I guess that sounds stupid."


"How much love inside a friend? Depends how much you give 'em."


Wouldn't that be wonderful, just take all your stress and worries from the day and remove it from your head for someone else to worry about?

Friday, November 16, 2012

Wedding Flowers


A picture from our wedding that I was able to first turn black and white, then "uncolor" the flowers, using a new program for my computer.

Monday, November 12, 2012

Homemade Lemonade

Now that winter is approaching, I crave a reminiscence of summer in the form of homemade Lemonade! So here's how you do it, it's easier than you'd think, and much better than the frozen concentrate stuff!


First you need lemons, 7 lemons if they're medium-to-large size, 9-10 if they're smallish. Roll those lemons under the palm of your hand until they're soft, like shown in the photo above. This helps release the juices, making your lemonade even more lemony.


Now you need 1 cup (250 ml) of water, and 1 cup (250 ml) sugar. Put them together in a little pan, and turn on medium-low heat. Stir occasionally until the sugar is dissolved. Set aside to let cool.

...lemon guts...

Now cut those lemons in half, and juice away! We have a little juicing machine, the white part on top spins so the machine does all the work for you.


Pour the lemon juice into a 1.5 liter bottle (50 fl oz), along with the cooled sugar water. Using a funnel helps from spilling. You may also use a big pitcher; I just don't own one, so I use a bottle.


Put the lid on and shake shake shake, shake shake shake, shake your booty...um, I mean lemonade! Now chill for at least 30 minutes, then enjoy!

Tuesday, November 6, 2012

Pizza -- Norwegian style

 First step in making pizza is making your pizza dough, though I was lazy again and used store-bought dough. I decided to stuff the short ends with cheese, and the long ends with strips of cheese left to melt along the edges to give a crispier crust. This is a hefty pizza, so beware!

What you'll need is this:
1 Pizza crust
pizza sauce
400 g ground beef (a little under a pound), browned
1 medium onion, sauteed
1 small leek, thinly sliced
lots of shredded cheese (at least 2 cups)
cheese 'sticks' for filling crust (optional)
basil
oregano


Next you'll want to fry the ground beef up in a skillet. When it's good and browned, spread the beef evenly over the pizza dough.


Now it's time for some sauteed onions! We love onions, so we used the whole onion. Feel free to use 1/2 an onion if this looks like too much for you. On top of the onions comes the sliced leeks, raw to give extra crunch and flavor.


Pour the sauce over the top of the whole thing, it will sink down to the bottom of the crust as it cooks, just be sure to spread it as evenly as possible.


Cover with cheese, and sprinkle a few more slices of leek on top. Sprinkle with basil and oregano to taste.
The outcome: a deliciously filling pizza, guaranteed to leave leftovers!

Mmmmm, cheesy pizza!